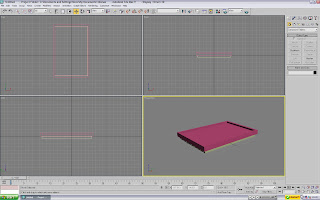
 First up, we make the table itself. 2 flat boxes, essentially. The only additional bit is a ProBoolean to chop a nice hole out of the centre, thus giving us the surface of the snooker table. And before you comment, yes, I am aware that snooker tables are a lot thicker than that...
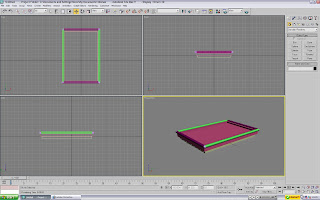 Next bit is to add the trim. This is indeed purely for style and showing-off purposes. A set of cylinders with spherical 'caps' on the corners are pretty sufficient to make a decent trim to the table. It's a fiddly process, but shouldn't be too taxing.
 ProBoolean help to cut out the holes in the table. Just place several spheres around where the pockets go, and pick them out. Now you have somewhere to pot. Goodo.
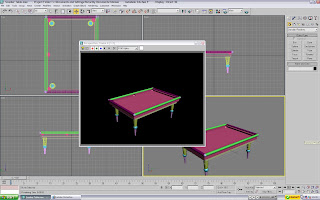 The legs aren't really anything fancy either. A pair of cones with a sphere in the middle. To make your lives easier, make one leg and clone it. Consistency with little effort and less time... what more could you want? Oh, a car? Well now you're just being picky aren't you? Anyways, your table is pretty much done now.
 Time to add the snooker balls! Again, this is nothing you lot shouldn't be able to handle unless you're too occupied with Facebook whilst you're making this. Log off and focus. Come on now, it's not like the chat function is any good. Get back to work. You can poke people later. Just make a single ball, and clone several times. The only tricky bit is setting up the reds in the triangle. But chip away at it slowly and you should be fine.
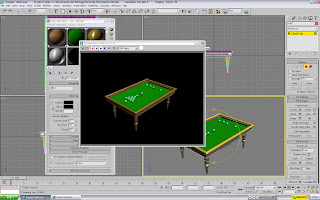 Texture time! The wooden siding was made much like the snail's shell from the previous 3D Sandbox. Just set the 'flow' of the photoshop brush to something like 30%, pick some nice browns and go nuts. The trim is made using the 'Anistropic' shader (Change it from Blinn). Pick a golden brown (Wonderful song by The Stranglers which I hope to learn on piano soon) and up the Specular Level and Glossiness. Also, because the trim is made of long tubes, up the anistropy to create an elongated reflection.
 The snooker balls were patterned with high Specular and Glossiness settings (On the default 'Blinn' shader) to give them a nice shiny look to them, without making them metallic. All you need to do then is pick the appropriate colours in the 'Diffuse' option.
 Job done... or is it? If you look at a snooker table, it has a 'D' and a line at the top of it. (It also has spots for the blue, pink and black, but these are covered so aren't as important). Oh yeah, adding the green matt to just that face (and not the whole shape) is acquired through the 'modify' object menu. Set it to select just faces, select it, and drag the texture to it.
 The matt is then made up. 3DS Max moulds the map to fit the surface it is placed on. As we are only applying this to a single face, it will stretch the overall shape to fit, but shouldn't distort it (Like if it was applied round a ball, for example). So don't worry too much about the dimensions of it. The D-shape was made by creating a circle, copying it, then shrinking the copy slightly. Then just delete/colour in the copy, and you now have a nice circle outline. Delete half of it and you have your D!
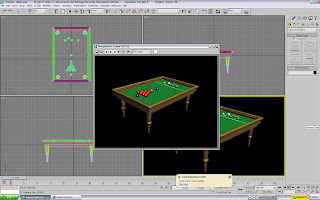
...apply this to the table, and you're done! Wonderful stuff. I'm so chuffed I just might explode.
Now back to fighting crime... Captain Pineapple... away!
2 comments:
Awesome. I think you're well on your way to mastering 3DS Max (unlike me...)
The snooker table looks fantastic mate well done
Is there anything you cant master?
Post a Comment