Tuesday 30 September 2008

My Favourite Cartoon Character

This was ideally meant to be our first post. However, I decided to leave it until I had a bit more of a grounding in 3DS Max.

Why?

Because I didn't just want to say who my favourite cartoon character is... I wanted to create them!
As ever, I have shown screenshots of the design process... see how quickly you can guess who it is...

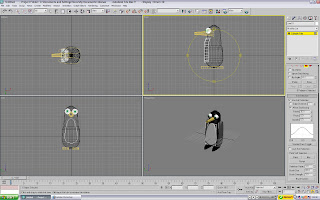
A yellow box, with several cylinders on top to create the basic shape. Those with keen eyes might have spotted a black box within the larger yellow one. Why? All will be revealed soon...


The cylinder nose... (Made in the same way as the penguin's beak) and the trademark eyelashes (rectangles rotated and extruded)... come on now, this one's easy!

The telltale smile... this is where the smaller black box comes in! The mouth was made by extruding a mouth shape, and then deleting it from the yellow outerbox with the ProBoolean tool. What this does is cut a shape out of the yellow outer shell, revealing the black box within it. result? We have a colour within the mouth, rather than just a yellow hole. Teeth, tongue, cheeks and freckles are all simple shapes.

Come on now, EVERYONE knows the little uniform...

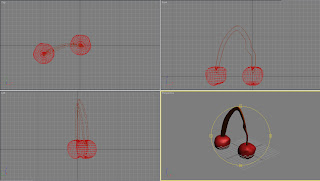
The sleeves are a result of 'lathe'. A simple (rounded) right-angled triangle was made with the line tool, and then 'Lathe' was used to make a rounded cone. From here, the vertices were pulled so that the tips were more attached to the body. The sleeve was then cloned and rotated.

You must know who it is by now... don't make me sing the intro...

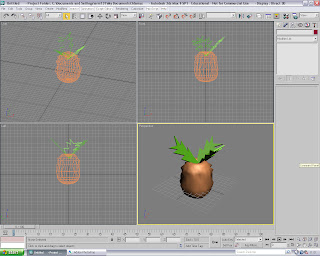
... Oooooooh.... Who lives in a Pineapple under the sea?

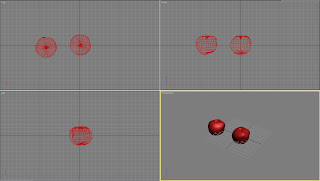
Shoes made from 2 spheres. ProBoolean with a cube meant that the bottom of the sphere could be cut off, to truncate the bottom of the sphere; thus creating a shoe.

This is what happens when you don't have a girlfriend.
Come on now, I cannot make this any more obvious...

... oh, maybe I can...

Yes, my favourite cartoon character is none other than Mr Spongebob Squarepants. Why? He lives in a Pineapple under the sea. What's not to love about that?

3D Sandbox : Penguin

I read somewhere that an obsession with penguins is the first sign of insanity. Chair-dancing to 'Scissor Sisters' is the second. So I'm pretty much doomed. Despite this, I wanted to try something a little bit tricker on 3D Studio Max. For some really odd reason, the idea of a penguin seemed perfect. So as soon as I started to get the hang of the software, I gave it a shot...

Okay, your best bet is to start off with a sphere. Due to the sheer number of vertices that adorn it, it appears to be the most versatile shape to use for anything with a round shape to it (Like said penguin). Drag the vertices out along the Z axis, to extend the penguin's hieght. Do it in steps though, so you can slowly narrow the body. If you move the hieght in one go, you will just end up witha giant medicine pill. So select around half of it, pull it up. Select a smaller section along the top, and pull it a little bit more. Morph and tweak as you see fit. The eyes are easy. Make a sphere, position it and clone it.


The beak is simply a cone

The wings start to make things difficult, particularly if the body is an odd shape. To start off with, create a simple wing-shape with the line tool, then extrude it. Clone and place on both sides. From here, use the 'bend' modifier and pull the vertices to mould it to the torso. It's fiddly, but shouldn't be too difficult. Just do it in small steps and you should be fine.

Creating the feet requires the 'convert to - editable spline' tool. It works in the same way as converting to an editable poly, only it appears to be reserved for editting 2D shapes. Making the feet just requires the vertices of the elipse to be pulled a little bit to stretch the feet slightly. Once happy, clone and position near the base of the penguin. Extrude.
Penguins. Quack Quack.
Making the 'belly' of the penguin works along very similar lines to the wings. Create the 2D shape, morph and edit until you are happy with it. Then extrude and attack it to the front. From here, you can pull the vertices to morph it around the penguin. Colour it and render and....

We have a penguin! 10-20 minute job. It's a very basic penguin though. I'll probably be back with more penguins soon...

3D Sandbox : Cherries

Welcome to the first '3D Sandbox'. Some of you fellow computer gamers will know what I mean when I say 'sandbox'. Yes, that's right, I play computer games. I also do not have a life.
For those of you who have a social life, 'sanbox' is generally an American term used in games, which refers to a 'mess about' test/level. Tutorials, for example. You have no direct 'goal', and can just try things out. 'The Sims', which most of you should at least know of, is a good example of a 'Sandox' style.
Anyway. The point to these are simply mini-tutorials and demonstrations of things made in 3D. Just me mucking around with the software really. Trying out new things and seeing what I can do. It's all good practise really.
Starting with something easy: Cherries
In essence, if you can make an apple, which the rest of you on my course should be able to blindfolded now, you have already completed most of the legwork.


Okay then, the first thing you need to do is create an apple. Just follow the same proceedures. Make a sphere (Found in the create toolbar), convert it to an 'editable poly', and then pull the vertices until you create a decent apple/cherry shape. All you have to do is create a 2nd one (or if you want to make life easier, just clone the first one!)
Next up are the stalks. Cherries stereotypically come in pairs, connected by a long stalk. This is basically made with the line tool. Make life easier for yourselves by selecting 'smooth' to both the line tool's options. This will round off the lines, making it look more natural. Convert to an editable spline (Not poly), and pull the edges until you are happy with them. Once happy, convert to an editable poly and extrude
Time for a bit of decoration! The tip of the stalk is incredibly easy. Just make a stalk in the same way you would an apple. Create a cone (Shaping it so it widens near the top), and then use the 'bend' tool to curve it. Rotate and position as per normal


Finish tweaking and there you have some cherries! And any users who make risque cherry jokes/puns will receive a stern frowning and my finger-wag of doom.
More fruit coming soon

Week II : Basic Modelling & Construction

--- 29th Sept ---

Emerging from my on-campus flat, I made my way down to my first lecture/tutorial in 3D Modelling.

I was introduced to 3D Studio Max, something which I had only known of from my Danish flatmate. I was, quite frankly, bamboozled by the software. It was big, scary and filled with more buttons and options on the interface than you could shake an unwieldingly large stick at.

Lovely

We went over the basics of how to construct basic shapes. Using the line tool to create a fish shape, it was converted to an 'editable poly', and extruded. In other words, the fish shape was taken from a 2D image, and made into a 3D one. Nice and easy. That was about as far as I got. A nice fish shape. Maybe make a younger brother for it too, just to be really interesting, like all us bloggers are. The line tool is prtty similar to line tools in most other programs (Thankfully), including options for bezier corners, seen with the pen tool in software like Flash. Extrude was also pretty easy, as I've previously worked with 'Pro Desktop', and it was incredibly similar to that: Pulling a face from a 2D surface. So for the moment: Very familiar ground.

We went over more and more, and the basic shape manipulation from Week I was recapped for us newbies. From the half-hearted fish shape, we finished with bowls, text and random assortments of fruit.

Included below is an apple made in the lecture. Literally a 2-3 minute job:


Not bad. The basics of the software started to make sense now. To be quite frank, creating basic shapes and objects wasn't too difficult. Once you got the hang of the interface and the 4 views, it wasn't to tricky to start working on other shapes and objects. Unlike Pro Desktop, shapes did not have to be built upon other shapes or 'planes', and if they overlapped; the software did not complain (Granted, Pro Desktop was more for Computer Aided Manufacture). So it was easier to start off. It was pretty much a case of just dragging shapes to the stage and working with them.

To play with the software a little bit longer, I tried creating some new fruit. Considering the fact that my name is Captain Pineapple, it seemed particularly obvious what had to be made...


Stop laughing. I'm new at this.

Next on the agenda was the assignment of our... er... assignment. Details of this will be discussed in a bit! Until then: Stay safe and don't do drugs.

Captain Pineapple.... Away!

Week I : Sleep

--- 22nd Sept ---

I had not received my timetable for my modules at this time. I am on a slightly different course to most of the others (I am on 'Computing & Information Systems', what I like to refer to as 'Computing Pic 'n Mix'.)

I had only selected my modules the previous week and was awaiting confirmation

Therefore, for this lesson, I was most likely in bed

Monday 29 September 2008

Captain Pineapple has arrived!

First post for Captain Pineapple. AKA: Steve Muller
Welcome citizens to my blog! I am the one and only Captain Pineapple.
Whilst sitting here sipping a nice cup of Darjeeling and with 'Pete and the Pirates' playing in the background, I finally return to actually make something out of this blog. I'm still new to the whole blogging process, as I have never done something like this before. I have vehemently insulted and generally bad-mouthed the entire Blog-culture for it's pretentious "Look at me! Isn't my life and viewpoints soooo amazing?" style... yet here I am now. Before you ask what 'converted' me over to the dumb-side, I am still a great hater of blogs. I just have to make one for my assignment.
In lieu of this, I quite like the idea of blogs as opposed to a full written assignment. For one thing, the work can be spaced over several weeks, rather than sitting up at 4am with a strong mug of coffee, tapping out 2000 words of complete rubbish before the deadline the following day. And also because I have the habit of rambling, the lack of word count is particularly refreshing. It is also rather informal, which is awesome. I mean, what essays allow you the title "Captain Pineapple goes 3D" and the usage of words such as "Bamboozle"?
If you haven't bothered to read the sub-title of the whole blog, this is for the Module "3D Modelling and Animation". Making use of '3D Studio Max', we have to construct 3D objects, funnily enough. This blog is here to detail and outline the things learnt each week, as well as mini projects and images I try out and throw together.
Blogs are generally pointless, so I want to make mine somewhat useful. With the images I create, I will try and compile a "How did I do that?" post, to detail the construction (and to prove I made it). That way, for those of you also new to 3DS Max, you might learn a few things. However, a basic knowledge is recommened.
Captain Pineapple.... Away!