He's alive! My cute robot is really alive!
Ladies and gentlemen... for the first time ever... I present to you: DiscoverBot!
This is part of my Assignment in the module "3D Modelling and Animation" Captain Pineapple will return with something witty in good time citizens
He's alive! My cute robot is really alive!
Ladies and gentlemen... for the first time ever... I present to you: DiscoverBot!
 That's it... the texture I used. Just a grey box with a selection of lines... aaaaaand...
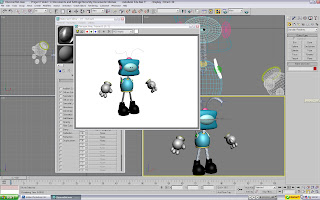 There we go! The legs now look a tad more realistic and less plastic. Creating more and more horizontal bars was simply a case of increasing the amount of tiling the map had (The legs are in fact around 3-5 copies of the map tall)
 An exceptionally minor adjustment; which, quite frankly, is probably not very noticable. In fact I'm willing to bet that most of you thought I accidentally posted the same picture. In actual fact; the leg cords now have a 'bump' tool applied to them. I re-applied the mask as a bump; to basically 'cut out' the black lines; to make them somewhat narrower than the silver outer bars. It's a small change but adds to the realistic look of the legs.
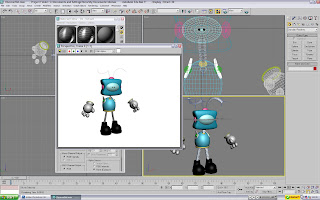 The next step was to repeat the above on the neck. Though basically the same; the neck is much shorter in comparison to the legs. If the same map was used; the neck would have the same number of bars as the legs... and as it's shorter: the bars would therefore be much closer together (The previous images show you what I mean)
 The next step was one of the worser ones. There was no putting it off; and unfortunately it proved to be the largest pain in the butt.... the gloves. Using the above texture; I had to carefully wrap it around...
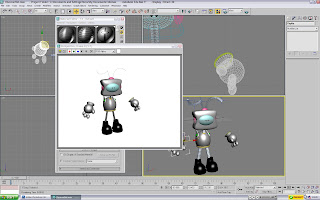 The hands... and boy did it take a while. Sadly; I don't have the screenies of it... but basically it was sitting down and testing numerous positions and scales on the UVW Map tool. It took a lot of trial and error to get the pattern to encircle the orb in a straight line. After that; I basically cheated a bit and rotated the orb so that the pattern was facing the right way (Circle on the back of the hand). It's not an experience I'd like to re-live; that's for sure. Hair-ripping moments; that's for sure!
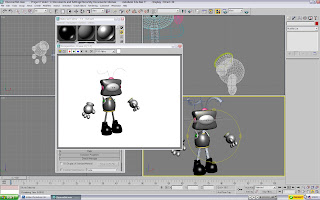 As well as an overall paint-job (testing new styles); you might also notice that DiscoverBot has had his shoes polished too.
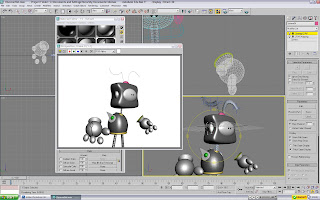 Working on the head now... and the ear-pieces were simpler versions of the glove fiasco. Again; it took a bit of trial an error on the 'Unwrap UVW Map'... but I got there in the end.
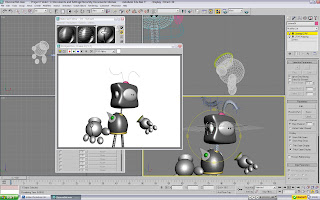 The next step was going back and adding a spot of realism to the ear pieces and gloves. Much like the leg and neck cords; I used the bump tool on the patterns; to cut a groove in them... instead of just having black lines painted over the place.
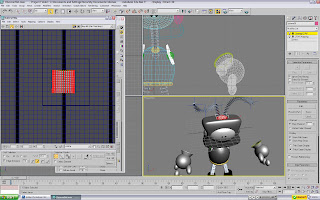 This image captures one of the less stressful UVW Mappings. The top port (with the antenna). Much like the others; this was given a splash of bump tool; to add a little bit of depth. The 'groove' is also much larger than that of the ear pieces; hence why the 'selection' on the UVW window is so small (The line appears larger... with me?)
 Aww! Cute! Now I could leave it there... but some leg and neck joints would definitely look better.
 That's more like it! The legs and neck were made in a very similar fashion to the antenna from when I made the head. It was a long string of many, tiny bones; where the tips were linked with the HI Solver. The netx major step was then to link everything up. Basically; in order to make my life easier; it paid off to link all the segments to eachother... that way; if I moved one bit; I didn't have to go around moving all the other bits aswell. It took some time to link the parts; particularly making sure that the HI Solvers still worked when they were linked to body parts. It took a bit of trial and error; but it's in a pretty good state now for animating.
And there he is! DiscoverBot ready for animation! Next step is to texture him so he doesn't look quite so plastic or like the older brother of Bomberman (Kids game... formed part of my childhood...)
 The basic palm is nothing crazy. A sphere with a cone on the end. Just for style; the cone has been pushed in a bit to create a nice dent. It just looks a little bit more stylish than a flat cone, after all. Everybody knows that...
 Hey now, this looks cool! Was this really made from sitting down with the editable poly tool and pulling vertices left, right and centre until I had this shape?
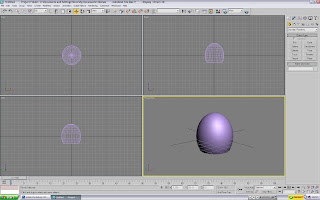 The first step was simple; make an egg (Take a sphere and have a bit of fun with the 'scale' tool) and hemisphere it so that the bottom segment is chopped off (To create the skirt-like style I settled upon)
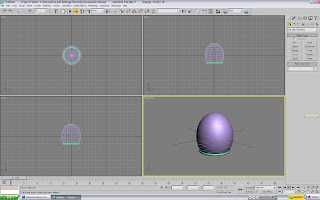 Just for aesthetic purposes; I added a Torus onto the bottom to create a funky bit of trim
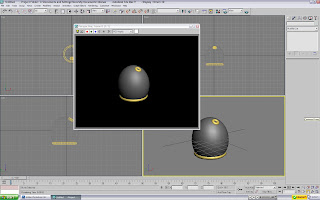 The 'neck brace', where the neck tube will feed into, was another Torus (Basically a doughnut) delicately placed on top of the egg.
 Just for a little bit of style; some wing-like shoulder segments suited the torso nicely; and help to add more 'direction' to the torso; rather than just an egg with a mini-doughnut (As you can probably tell by the repeated food references; it's almost lunch time). The basic wing shape was simply a cylinder that had about 3 of its vertices pulled out. It was really that simple.
 Twist them, tweak them and round them. Plonk them onto either side of the torso and see how it looks.
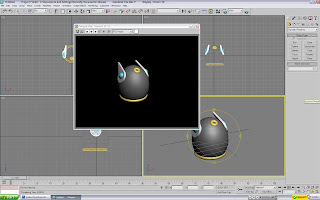 It seemed a nice idea to add some 'power orbs' or something equally stylish onto the shoulder pads. For one thing; it adds more to them... and secondly; trying to cut out a hole was more trouble than it was worth. If I tried to ProBoolean out a pair of holes of the finished shape; it'd crash... and if I placed them in beforehand; then the MeshSmooth tool would throw a wobbler and create some unusual lines on the poor thing. So I scrapped it and plonked a few spheres onto the ends.
 Though it might have been stronger to work from a sphere; I felt that working from a cube was more advantageous. The head is an unusual shape that's pretty much half-cube, half-sphere with a few segments pushed inwards. Either way; it would be easier to round off a cube; than trying to straighten out a ball. So taking the cube; I upped the number of segments (On all axes) in order to give me more vertices to work with. It was then about sitting down and just tucking parts in; pushing segments around and created a decent shape for the head. Not bad; let's see what this looks like with a bit of MeshSmooth applied to it...
 Pretty nice! Not quite as 'round' as I hoped... time to go back and push some more of then edges inwards; thus cretaing a champher; which when rounded will become more of a nice curve. Job done!
 The screen was nice and easy. Take a sphere and have fun with the scale; in order to flatten areas and create a flat oval to go onto the front of DiscoverBot.
 Aww! Cute! The eyes are simply a pair of spheres... nothing exceedingly 3DSMax-heavy here
 Ear-port-thingies were also just a pair of compressed spheres.
 Same with the antenna-port. Exceptionally simple shapes... but creating a rather cute and endearing creation!
 The antenna required a little bit more work. The rest of the head will work as one; even the pupils. They will all stay in the positions they are now; and turn/pivot/move as one. The antenna, however, will need to move independently. They'll need to be able to shake and move when DiscoverBot moves (To really up the realism). This was completed with a ton of bones; all linked with a very handy 'HI Solver; under the IK Solvers menu.
 Here's the basic bone structure of a leg. The top is the femur; followed by the fibia/tibia, and then the ankle.
 Now; if I wanted to bend the knee; I'd first have to rotate the femur into position...
 And then rotate the fib/tib back round. Thus creating the knee joint. However; this is quite time-consuming and would be hell for something like an insect; which boasts several legs!
 So what we do is link the femur and the ankle with an 'HI Solver'....
 So we now have DiscoverBot. The next important step is whether I can animate the guy! Drawing it is one thing... but making it move in 3D without repeated problems is another...
 And there he is! DiscoverBot Mk II. The finished design of what I'm hoping to animate. There's not been too many changes to the last sketch; however, the main one is the introduction of the 'skirt' like torso. Basically; one of the biggest problems was how to link the legs to the body; whilst allowing a decent amount of freedom and still looking semi-realistic? The ideas of hinges, ball-socket joints and such were thrown about... but the skirt idea was most practical. That way the legs could have full-freedom without too many joints and attachments needing to be made.
 Another vital development here was the removal of the body segments. Creating a torso and hip segment, linked by a spine would be more hassle than required. In addition; a small round body is much cuter (I really need a stronger word than this...) and more versatile... so win-win in my opinion. And thus; a few more scribbles later:
 We have DiscoverBot Mk I! Cute! Big round head, small eyes, tiny body, massive feet. Just the look I'm going for. I also finally sorted out the hands; which had been giving me some grief (Bottom right). It was hard to get robot hands that worked with the image of DiscoverBot... and the round orb with little floating fingers and thumbs suited it best. A few more tweaks needed; but this was roughly what I was firing for.
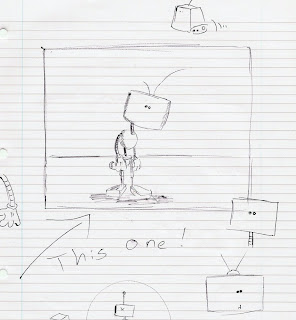 A few more thoughts later and I had an idea... have a peek at the over-complicated mood-board first and I'll explain...
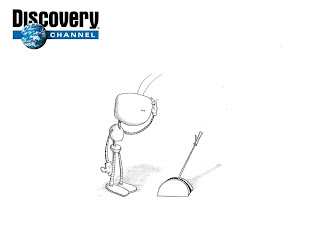
"A robot... and a lever?" you dryly proclaim; staring at your monitor wondering what elaborate joke this is. Is that it?
Indeedy! That's it. The immediate thing about this is that it's easy on the eyes. It's not overcomplicated and almost 'cute' for want of a better word. The plain background pushes the entire attention upon the robot itself (Now un-originally named 'Discover-Bot'). So why did I settle on this?
After seeing the robot just on a plain background... no gadgets, no fireworks, no over-sized pumpkins breakdancing to Hammertime... it reminded me of several in-game videos for a wonderful little gem on the PC called 'Worms 3D'. Have a quick peek at them. Notice a running style through most of them?
http://www.youtube.com/watch?v=4IFQMr6u9no
As you can see; most of the videos have a worm, with a little patch of ground beneath them (Sometimes not at all)... and that's it. No complicated scenery and backgrounds... just them. And the amazing there is that it works. Your attention is completely focussed on the action; and it looks so pleasant and cartoony. It's perfect and entertaining to watch. As odd as it sounds... it's 'pleasing to the eye'. It's like eye candy that isn't packed with sugar; if that makes sense. The style of the videos were just the sort of thing that I thought would be fun to do.
From here; this also reminded me of one of my favourite adverts... 'The Famous Grouse'
http://www.youtube.com/watch?v=BAJ__XOmsLI&feature=related
http://www.youtube.com/watch?v=6jF-x0Jn8hY&feature=related
Again; it's simple... it's just the grouse and the plain background... but it works! It's the simplicity of it which makes it work so well. Had the Famous Grouse been on a background of, say, a forest... it wouldn't have had the same impact. And that's the look I wanted to achieve with mine.
As for Discovery Channel? Well; that idea came about from what the robot would be doing. I had the style but not what he'd do or who for... Discovery Channel is well known so it was one of the first channels to spring to mind; and the name suddenly gave itself the theme... discovery! Thus, the idea was hatched... a robot on the simple background discovering things with each ident. One ident he finds a lever, tries to pull it... etc etc... and you just see him discovering different things with each one. And so, the plan had been decided!
So now; go back and look at the Mood Board. Though it might just look like a sketch... it conveys the exact mood I want from this... simplicity. Something easy on the eye... nothing overcomplicated with too many colours or things going on. That's not to say this is going to be easy. The increased focus on the robot means that he basically carries the entire ident. The animation has to be spot on for this to be enjoyable. If the robot's movements are weak and unrealistic; the entire ident will fall flat on its face. And that's where my focus will have to go... making the robot near perfect