Though this isn't meant to be covered until next Semester, I've been told about a wonderful little trick, which I just have to share with you lot. It's about using bones to aid movement! "Movement!? But we're not doing animation!" I hear you exclaim... (Please exclaim it now. Shout it at your computer monitor, it'll make me feel special). Whilst it is true that bones are tailored for making moving joints and limbs so much easier, there is nothing to stop them being a practical tool in still life! Observe:
Look at this cylinder. Wouldn't it be nice to make a tree branch out of it? Obviously, tree branches are not that straight. They're normally jagged and almost like a zig-zag. Now, if you want to bend it, you could just use the 'bend' tool. But what if you need more than 1 bend? Multiple cylinders? Sit there for ages with the 'Vertices' tool, pulling it this way and that? You can do that if you want... or you could do it like this...
First up, you need to make the bones. In the sub-menu where you can create normal shapes (Top left arrow), look for the little set of cogs at the far right (The arrow furthest right). Select this, and then select the 'Bones' option (Bottom arrow).
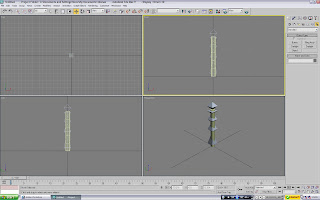 All you do now is create them! You make them like you do any other shape. Click, move to where you want it, then click again to fix that bone. The next will automatically begin. When you want to stop, right-mouse click. Draw a chain of about 3-4 bones inside your cylinder. Don't worry if you don't create them inside it, you can move the cylinder or the bones (Moving the 'foundation' bone: ie the first one you place. Will move the lot of them) to fit. Move everything around until the bones fit comfortably inside the cylinder. Don't worry about the bone shapes. They're not shown when you render!
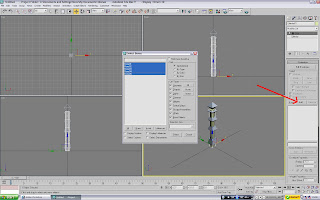
Before you can start to move them, however, you need to 'attach' them to the cylinder. So click on the cylinder (Make sure that is the one selected, not one of the bones), and under the modify tools, look for 'Skin'. You should have a small menu appear on the left. Above the blank white box, click 'Add', to add components (Specifically: Bones) to the skin. A window should come up in the centre. From here, pick the bones you want to 'connect', and add them.
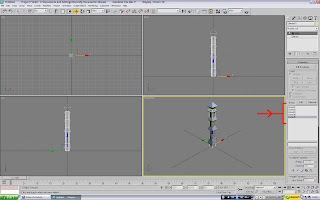 If you've done the job right, you should see the bones now listed in the previously empty white box on the side of the screen. This is a good thing.
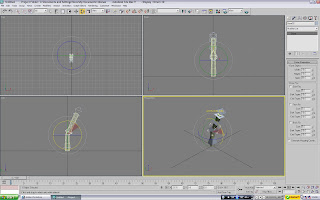 What you can do now is move/rotate each bone, and mould the cylinder to your liking! If you want to move the entire thing, move the 'foundation' bone. If you move the shape, you will move it away from the bones. As you will see, moving/rotating a bone will pull the cylinder with it. Here, you can now create several joints and bends effortlessly.
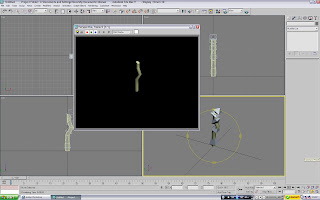 As you can now see, the twig upon rendering has lost the bones, but also been twisted and bent into a more twig-like shape. With any other method, this would have taken a lot longer. But thanks to bones, it's been made much quicker. Seriously, bones are a God-send. Anything that requires a slight bend/twist are generally best done via bones. Why work harder when you can work smarter?

No comments:
Post a Comment